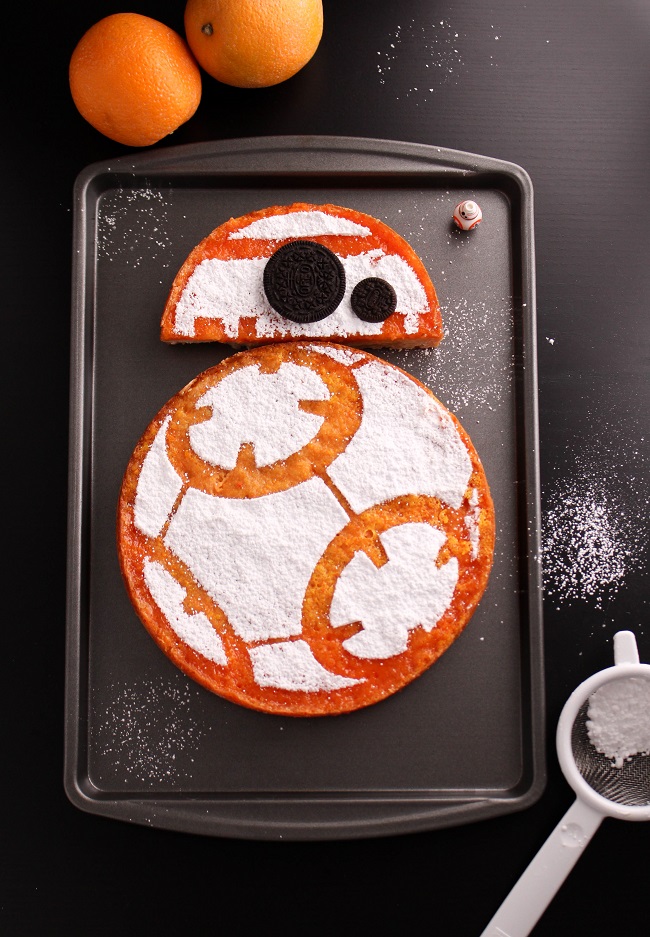
BB-8 Orange Bars
Prep time
Cook time
Total time
Serves: 14
Ingredients
Crust
- 2¼ cups/ 290 grams all-purpose flour
- ⅔ cup/ 90 grams powdered sugar
- a pinch of salt
- 16 tablespoons/ 230 grams unsalted butter, at room temperature
Filling
- 1 cup / 210 grams sugar
- 3 eggs, at room temperature
- 1 tablespoon grated orange zest (from about 1 large, or 2 medium, oranges)
- 6 tablespoons / 90 ml orange juice (from about 1 large, or 2 medium, oranges)
- red and orange food coloring (optional)
Other
- Butter, for greasing pans
- Parchment Paper
- BB-8 head and body templates (see head note for links)
- powdered sugar
- 1 half full-sized Oreo
- 1 half mini Oreo
Instructions
- Grease a 6" and 8" cake pan with butter. Line the bottom with parchment paper and grease the paper. If you do not have removable bottom pans cut 2-4 strips of parchment paper and use them to line the bottom to make hoists (see photo in head note).
- Preheat oven to 325°F/160°C.
- In a stand mixer fitted with a paddle attachment, or using a large bowl and a hand held electric mixer, mix together the flour, powdered sugar, salt, and butter. Mix until it resembles crumbs.
- If you don't like a thick crust you can discard about 10% of this mixture. If you have a scale you can do this next part exactly by weight, otherwise eyeball it the best you can. Take about 60% of the crumbs and put them in the 8" pan. Put the rest of the crumbs in the 6" pan. Using your hands or the bottom of sturdy measuring cup, press the crumbs firmly into the pan. You want to press it as tightly as possible and fill in all gaps.
- Bake the crust for 20-25 minutes, or until golden brown. If you put both pans in the oven at the same time, keep an eye out for them and rotate halfway through to ensure even baking.
- Once finished baking, remove from the oven and let the crusts cool slightly.
- In a large bowl, whisk together the sugar, eggs, juice, and zest.
- If you want a rich orange color for BB-8 add a few drops of food coloring. Add 1-2 drops red and 2-6 drops yellow. Stir, then adjust to reach your desired color. Be careful, the red can be strong so go slowly!
- Pour about 60% of the filling mixture over the 8" pan and the remainder over the 6" pan. If one feels more full than the other you can use a spoon to transfer filling between the two until even. If you have a scale you can also do it more precisely by weight. Note: the filling is runny so some might seep underneath the crust. That's ok!
- Bake the filling for 20-25 minutes or until the edges are set and the center is just ever so slightly wiggly. If you're baking both pans at the same time, rotate the pans halfway through. Keep your eye on the pans to make sure they bake evenly and that the 6" pan doesn't get over done.
- Remove from the oven and let cool slightly. Then cover with plastic wrap and let cool in the refrigerator for one hour or up to overnight. This step is important because it will help set the filling and help the BB-8 design last longer.
- While you're waiting for the bars to cool, put the templates on a cutting board. Use a sharp knife to cut all the spaces that say "discard."
- When ready to decorate, remove the orange bars from the pans.
- Cut the 6" round in half. Wrap up one half and put away, you won't need it for BB-8.
- Align the BB-8 Head template over one half of the 6" round. Sift a thick opaque layer of powdered sugar over the orange bar. Carefully remove template and discard it.
- Take the full-sized Oreo half and place it centrally on BB-8's head. Align it with the semi-circle shape made with the powdered sugar.
- Take the mini Oreo and place it slightly lower and to the right of the full sized Oreo. You now have BB-8's head!
- Align the BB-8 Body template over the 8" round. Sift a thick opaque later of powdered sugar over the orange bar. Carefully remove template and discard it.
- On a platter or cookie sheet, arrange BB-8 head above the BB-8 body. Step back and enjoy your work.
- Serve immediately. Cut into wedge shaped slices. May the force be with you!
Recipe by Cooking is Messy at https://www.cookingismessy.com/2016/05/03/bb-8-orange-bars/